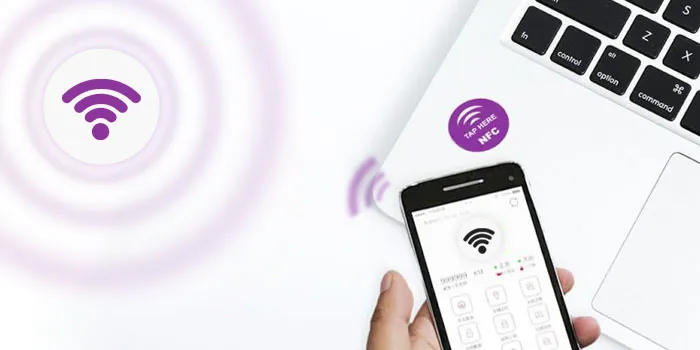
Connecting Wi-Fi networks is tiresome, particularly when dealing with complex and intricate passwords. But do fear! Near Field Communication (NFC) is an amazing technology that enables you to connect to Wi-Fi with just one tap of your NFC-enabled device on an NFC tag.
This detailed guide will help you understand how to program NFC tags for Wi-Fi connections. It is easy to understand and accessible for everyone!
Requirements for NFC Wi-Fi Connection:
To get started, all you need is:
- A smartphone or device equipped with NFC capabilities.
- Blank and writable NFC tags, with NTAG213 or NTAG215, are ideal for compatibility and storage capacity.
- Be sure to have an NFC tag-writing application installed on your smartphone or device.
Now, we will immerse ourselves in the setup of the Wi-Fi NFC connection with these essentials!
Programming NFC Tags to Connect to Wi-Fi; Step-by-Step Guide:
- Step 1: Gather Wi-Fi Details:
First, collect all the required information about your Wi-Fi:
- Network name (SSID): It’s like Wi-Fi’s first name.
- Password (if there is one): You must know the correct password.
- Security Type (WPA2, WEP, or open): It is a Wi-Fi security level. It can be like a closed door (WPA2), a door with a simple Lock (WEP), or even without any lock (open).
Having these details in hand is like having a treasure map: you will need them for the next steps to program your NFC tag.
- Step 2: Get an NFC tag-writing App:
Now, for magic to happen on your NFC tag, you will need a special application on your smartphone. It is like a tool that will help you customize your NFC tag. That is how:
Install a NFC Tag-Writer application: this is an elegant application that allows you to tell your NFC tag what to do. Do not worry; there are many free and paid applications available for Android and iOS. Some great include:
- NFC tools (for Android)
- NFC TagWriter by NXP (also for Android)
- Simple NFC (if you are in iOS)
Now, it is time to download and install the app from the app store. Once done, you are ready to move to the next step!
- Step 3: Open NFC Tag Writing App:
Now, when you have successfully installed the NFC tag-writing application on your smartphone or device, it is time to open it. Simply, tap on the app’s icon.
The way the application looks might look some different depending on the one you choose, but don’t worry! The main steps will be pretty much the same.
- Step 4: Create a New Wi-Fi Entry:
Now, within the NFC tag app, search for the button or section written something like “Wi-Fi” or “Connect to Wi-Fi” (words can vary depending on the app). In this section put all the Wi-Fi information that you collected in step 1. It is like filling out a form, but it is simpler.
- Step 5: Put your Wi-Fi Network Details:
Now, let’s fill out the blank spaces! Where it says SSID or network name, write your Wi-Fi name. Write your Wi-Fi password if there is a password or key place. And for security or encryption, select one that matches your Wi-Fi (such as WPA2, WEP, or open).
Just make sure everything is CORRECT before moving to the next steps.
- Step 6: Save your Wi-Fi Record:
Once you have written all the Wi-Fi details, press the save button on the application. This will make the data ready for writing onto the NFC tag.
- Step 7: Get Ready the NFC tag for writing:
It’s time for magic to happen! Make sure your NFC tag is blank and ready. If you are unsure, see the application, as many applications have a feature that allows you to verify whether the NFC tag is writable and even erase any old stuff.
Place the NFC tag on a flat surface, far from metal objects. Metal Mess with the Magic NFC signal!
- Step 8: Write on the NFC Tag:
In the application, find where it says “write,” “save,” or “Write Tag.” Click that.
Now, follow what the application says. It may ask you to place your phone near the tag (about 1-2 cm). Wait for the application to say “done”; it means that your Wi-Fi information is copied on the NFC tag.
- Step 9: Test your NFC Tags:
Once you have completed the above steps, it’s time to test to see if it works properly. To do this,
- Turn off the Wi-Fi on your phone.
- Make sure the NFC is on.
- Touch your phone on the NFC tag.
If your phone connects to Wi-Fi without asking for a password, you are successful. If that does not work, re-check the information you put in the app or rewrite the data.
- Step 10: Make your NFC Tag Secure:
If you wish that no one should mess with your Wi-Fi Tag, you can lock it or add a password in the app. But remember, once it’s locked, no changes are allowed!
Find the Wi-Fi item you made in the app to lock it up. Look for the lock or protect, click it, and say yes. Easy peasy.
- Step 11: Locate your NFC tags where they’re Handy:
When your tag is ready and working, please place it in a convenient location where it’s easy to reach with your NFC device.
Congratulations! You have successfully programmed NFC tags for Wi-Fi.
By following these steps, you have made connecting to the Wi-Fi a breeze, eliminating the discomfort of writing information manually.
In summary, NFC tags offer a simple and easy way to link with the Wi-Fi—just one tap away. Follow the above guide, and you will easily set up NFC tags for the Wi-Fi connection.

